Quick Start: Choose Your Learning Path
What you'll learn
This guide gives you the context you need before starting a Pandora project. By the end, you'll know:
- Which chapters cover hardware setup, development tools, and application workflows.
- How Pandora combines an NVIDIA Jetson module with the JetPack software stack.
- Which physical ports to use for displays, peripherals, networking, and power.
Guide overview
Use the chapters in order for a structured introduction, or jump directly to the topic you need.
Hardware and system setup
Chapter 1: Quick Start
Learn the I/O layout and get oriented with the system environment.
Chapter 2: Motherboard Basics
Review board specifications, flash the system image, and expand storage.
Chapter 3: Basic Operation
Work with the Jetson desktop environment, networking, and core system tools.
Chapter 4: GPIO Control
Control GPIO pins and work with serial and I2C interfaces.
Application development
Chapter 5: OpenCV
Build common image-processing and camera workflows.
Chapter 6: Docker
Run containers, manage images, and execute packaged applications.
Chapter 7: Advanced Vision
Develop with DeepStream, YOLOv11, NanoOWL, MobileSAM, and vision-language models.
Chapter 8: Offline LLM Development
Run local language and multimodal models, including Llama, Qwen, Florence, Phi, Gemma, and DeepSeek families.
Pandora at a glance
Pandora is an edge AI development system built around NVIDIA Jetson Orin NX and Orin Nano modules. It combines the Jetson compute platform, thermal management, and JetPack 6.2 or later in a compact enclosure.
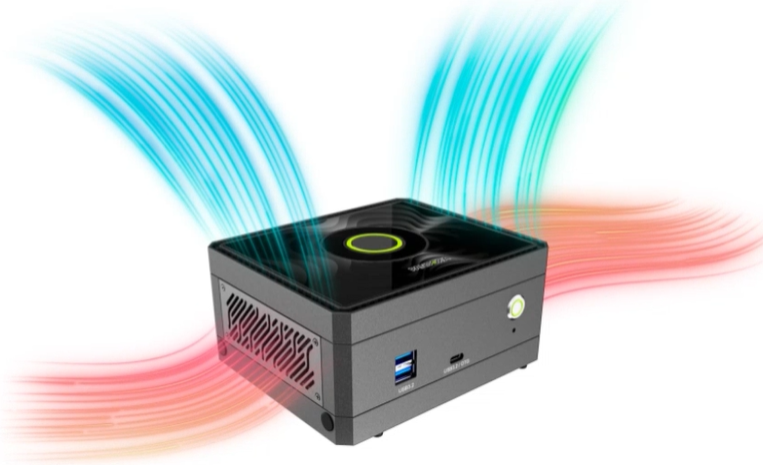
The platform supports computer vision, language, and multimodal workloads. The remaining guides cover the system configuration and runtime setup required to deploy those workloads locally.

Pandora I/O
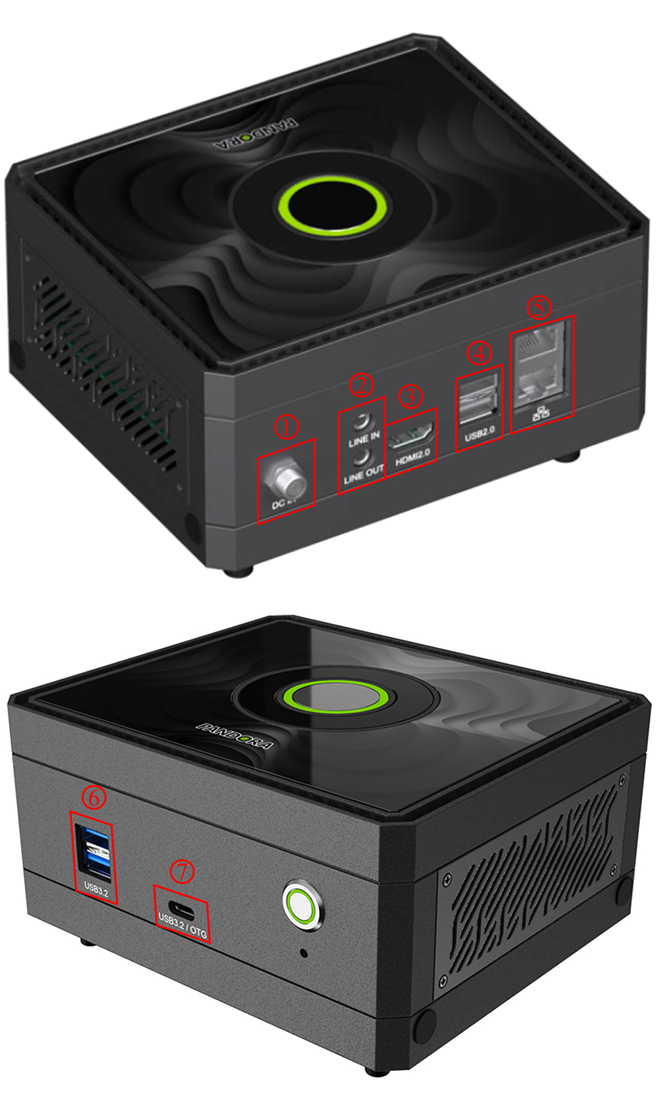
Use the numbered callouts in the following diagram to locate each interface.
Data and peripherals
- USB 3.2 Gen 2 Type-A ×2 (6): Connect high-speed storage, cameras, and other USB peripherals.
- USB 3.2 Gen 2 Type-C OTG ×1 (7): Connect OTG devices or use the port for system recovery and flashing.
- USB 2.0 Type-A ×2 (4): Connect keyboards, mice, and lower-bandwidth peripherals.
Display and audio
- HDMI 2.0 ×1 (3): Send video and audio to a monitor, display, or projector.
- 3.5 mm line input ×1 (upper port at 2): Connect an external audio source.
- 3.5 mm line output ×1 (lower port at 2): Connect headphones or powered speakers.
Networking
- Gigabit Ethernet ×2 (5): Connect to 10/100/1000 Mbps networks. DHCP is supported for automatic address assignment.
Power
- 12-36 V DC input ×1 (1): Supply power from a compatible DC source within the supported input range.
Continue with Motherboard Overview for board-level specifications and setup options.
Adapted from the original YUAN Developer Hub article. Source ID: 182.